
On this page
The short version
On a 16GB Mac, run FLUX.1 Schnell (Q4_KS build, about 7GB). On a 24GB Mac, run FLUX.1 dev (Q6_K build, about 10GB). A 1024×1024 image takes around 50 seconds on a 24GB M4 Mini. It is free and offline, all inside Draw Things, with no cloud and no code.
Flux AI is an open-source tool that lets you create detailed art from text prompts. You can use it on your Mac with the Draw Things app – no cloud needed, no subscriptions, and no tricky setups. Thanks to the simple Flux AI Mac setup, even beginners can get started in minutes.
Flux AI is free and open-source, and it runs offline on Apple Silicon Macs (M1, M2, M3, M4) through the Draw Things app. You pick a Flux model sized to your Mac’s RAM, download it from inside the app, and generate images locally. No cloud GPU, no monthly fee.
Tools You Need: Draw Things App
If you want to install Flux AI on your Mac, the Draw Things app is the one to start with. It runs roughly 20-40% faster than ComfyUI on Apple Silicon, thanks to its Metal FlashAttention v2 engine, so you wait less for each image.
Draw Things on Mac has built-in Flux support, you download Flux models from inside the app. It is the Flux app for MacBook and Mac desktops alike, the same build runs on both.
- Works on both Mac and iOS devices (like iPhone and iPad)
- Perfectly set up for Apple’s M1, M2, M3, and M4 chips
- Comes with a built-in downloader for Flux AI and other models
- Super easy to use, no tech skills needed
You can download Draw Things straight from the App Store, the steps for which we cover up next.
How to Run Flux AI on Mac, Step-by-Step
Running Flux on Mac takes four steps in Draw Things, no command line and no cloud account.
1. Download and install Draw Things on your Mac.
2. Open the app and go to the model downloader section.
3. Download the selected Flux AI model from the list.
4. Load and run the model locally.
Now let’s examine each of these steps carefully.
Step 1: Download Draw Things
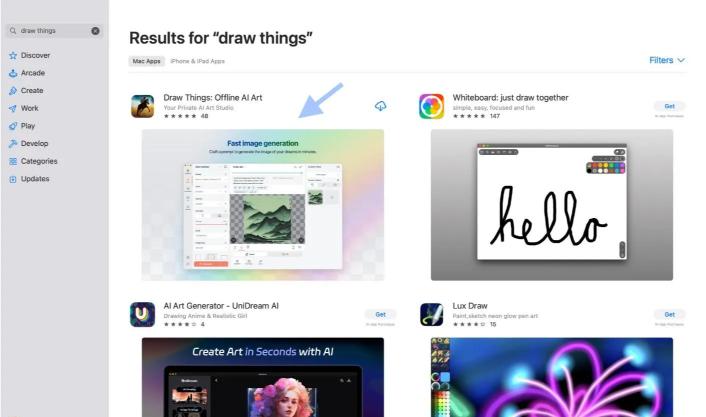
First, download the Draw Things: Offline AI Art app directly from the App Store.
For the best results, use a Mac with Apple Silicon (M1, M2, M3, or M4). To run Flux on macOS you want an Apple Silicon Mac (M1 or newer) and macOS 13 or later.
How much RAM you have decides which Flux model fits. A 16GB Mac runs Flux only with a smaller Q4_KS build (around 7GB). A 24GB Mac comfortably runs the Q6_K build (around 10GB).
The full FP16 model is about 24GB and wants 48GB or more. 8GB is not enough even with the smallest builds, since the base model alone needs 6-8GB.
Step 2: Open the App and Load the Flux Model
After installing, launch the Draw Things app. You’ll see the following interface, with three options:
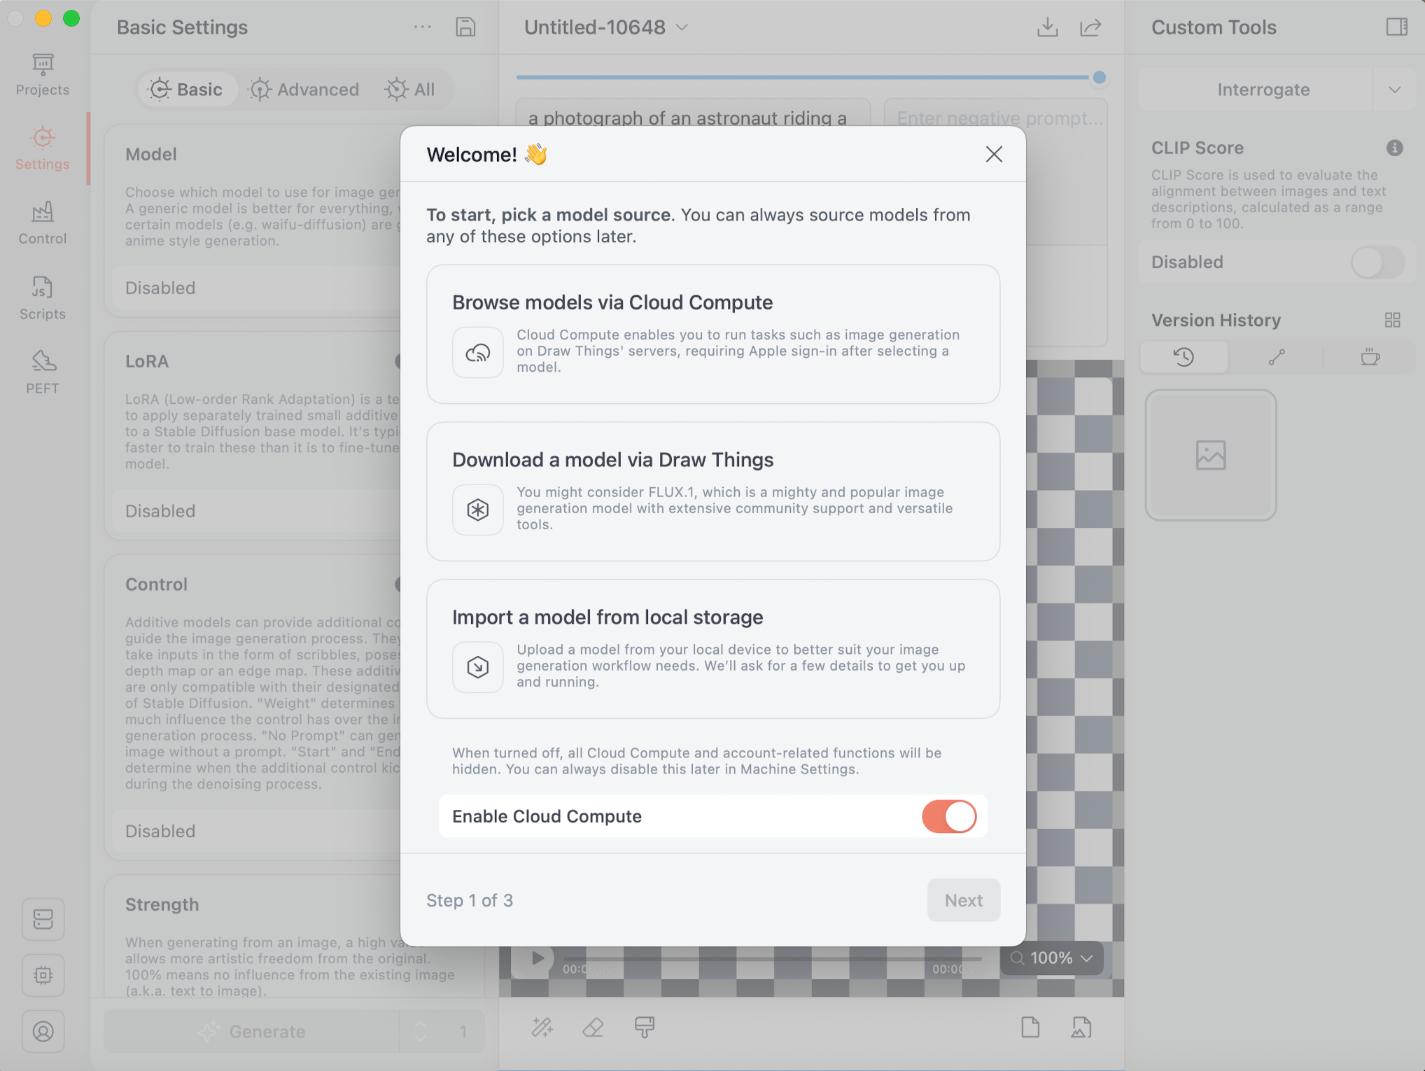
Choose the second option: Download a model via Draw Things. Then, look for “Flux” in the models section.
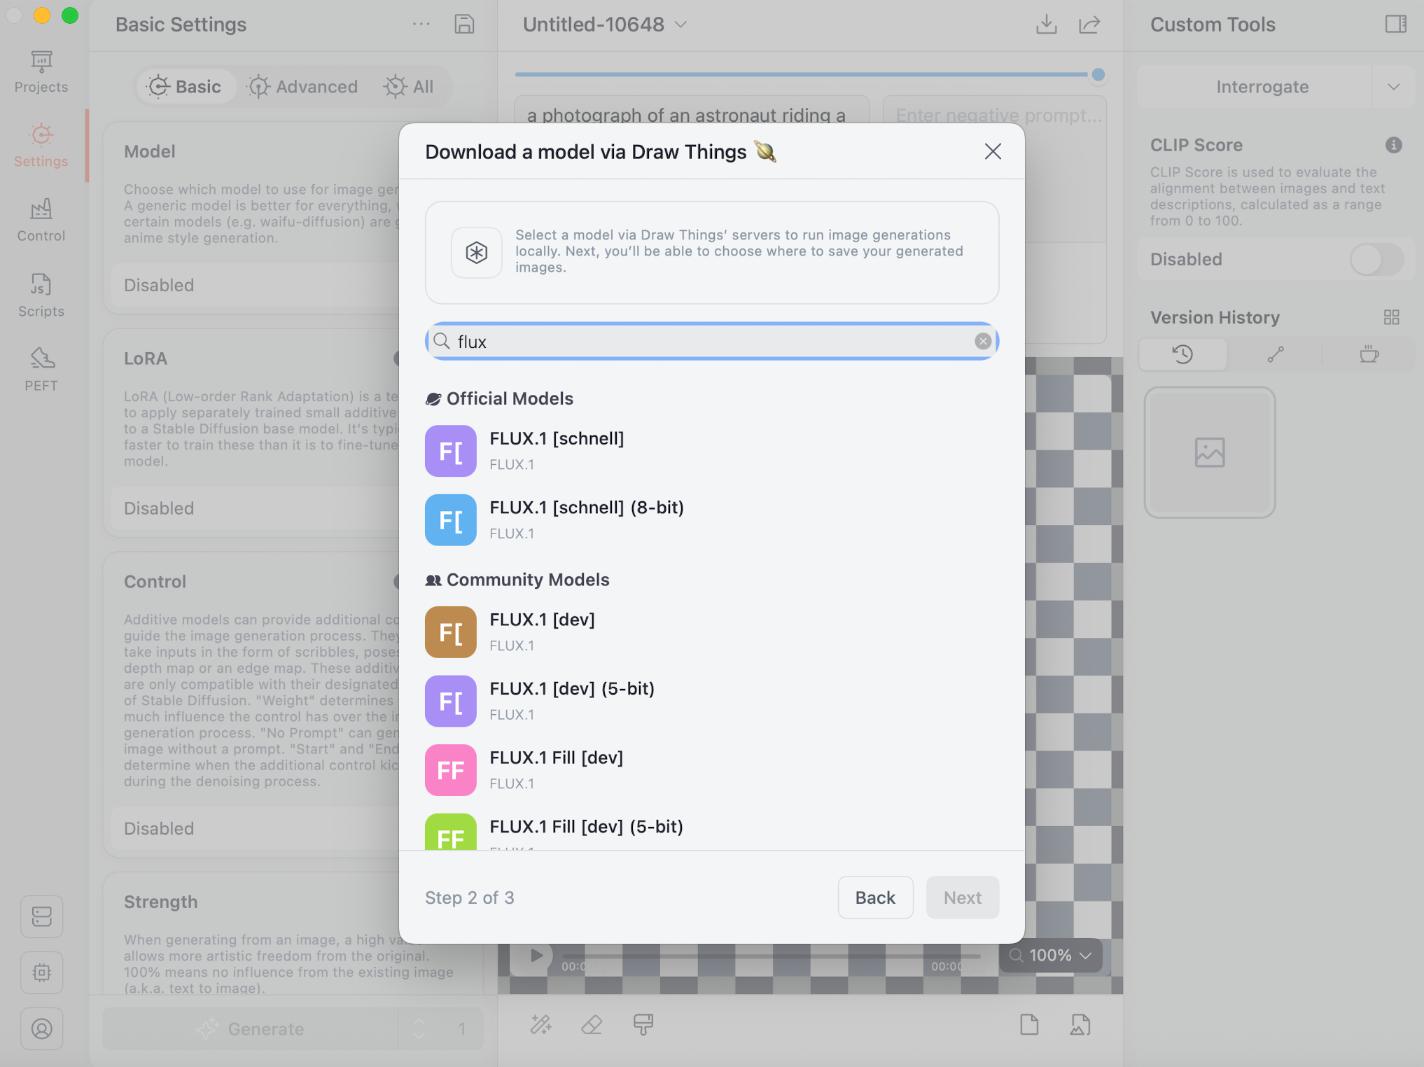
You’ll find different versions of the Flux model, like:
- FLUX.1 Schnell – this one runs in about 4 steps, so it generates images faster at slightly lower quality.
- FLUX.1 dev – this one takes about 20-25 steps, so it is slower but gives you higher-quality images.
As of 2026, the in-app list also includes the newer FLUX.2 lineup: FLUX.2 [dev] and the distilled FLUX.2 [klein], which Black Forest Labs shipped on 25 November 2025. Draw Things added FLUX.2 [dev] support in version 1.20251219.0. FLUX.1 Schnell and dev are still the simplest place to start.
Which Flux model should you pick? Match it to your Mac’s memory. On a 16GB Mac, run a quantized Q4_KS build (about 7GB) of FLUX.1 Schnell for speed. On a 24GB Mac, a Q6_K build (about 10GB) of FLUX.1 dev gives the best quality that still fits. The full model wants 48GB or more.
| Model | Quantization | File size | RAM you need | Best for |
|---|---|---|---|---|
| FLUX.1 Schnell | Q4_KS | ~7GB | 16GB | Fast 4-step drafts |
| FLUX.1 dev | Q6_K | ~10GB | 24GB | Best quality that fits |
| FLUX.1 dev | FP16 | ~24GB | 48GB+ | Maximum quality |
| FLUX.2 [klein] | distilled | small | consumer Apple Silicon | Near-instant previews |
Those Q-labels are GGUF quantizations: smaller files (Q2 up to Q8) that trade a little quality for a lot less RAM, which is how 16-24GB Macs fit Flux at all. The bigger the number, the larger the file and the better the detail.
Want the full picture on how this works across image models? Our guide to run Flux locally digs into it, and the same Draw Things path also covers Stable Diffusion on Mac.
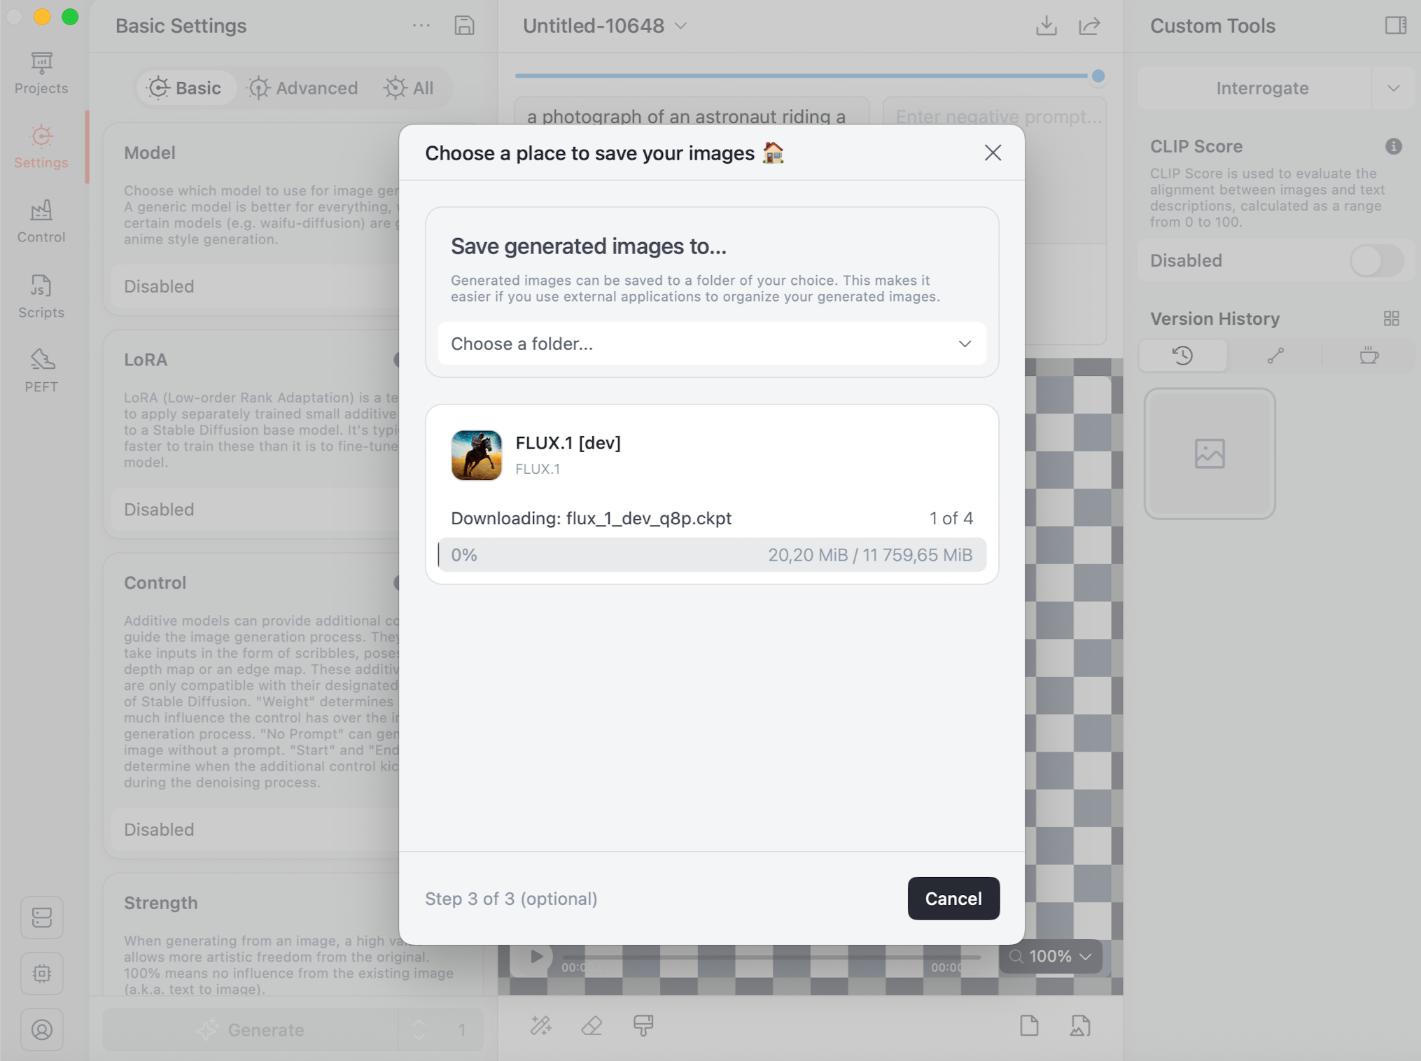
Pick the version you want and start the download. The full FLUX.1 dev download is about 13.6GB; the GGUF builds range from around 4GB (Q2_K) up to around 13GB (Q8). Draw Things grabs the model weights and installs them for you.
Step 3: Adjust Settings (Optional)
Before you create your first image, you can tweak some settings in Draw Things:
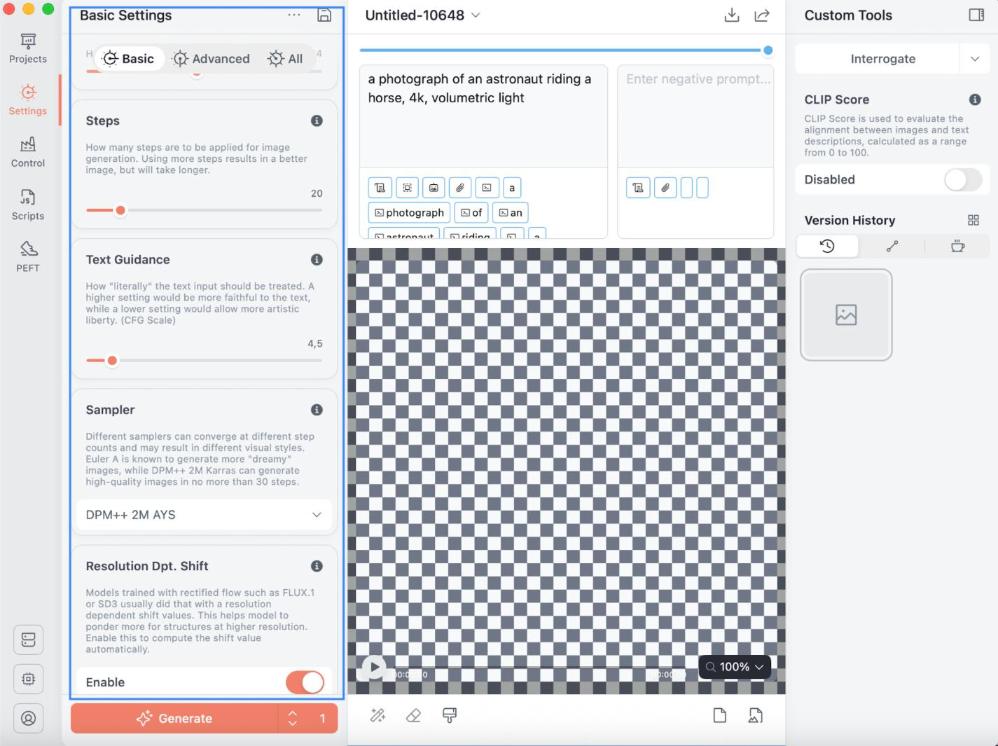
- Sampling Steps – Using a higher number of sampling steps gives you better details, but it takes longer. Schnell needs only about 4 steps, while dev wants 20-25. The Flux models accept anywhere from 1 to 150 steps.
- Image Size – You can choose from different suggested measurements. For best results, we suggest using 1:1 / Normal size.
- Strength – A high value of strength allows more artistic freedom from the original, ranging from 0% to 100%.
Step 4: Start Creating Images
Once your model is downloaded and ready, you can run Flux locally by entering text prompts directly in Draw Things.
1. Type your text prompt in the prompt field.
For example: “Create an image of a guy drinking a cocktail.”
1. Hit Generate and wait for Draw Things to create your image.
2. Your AI-generated image will save right on your Mac.
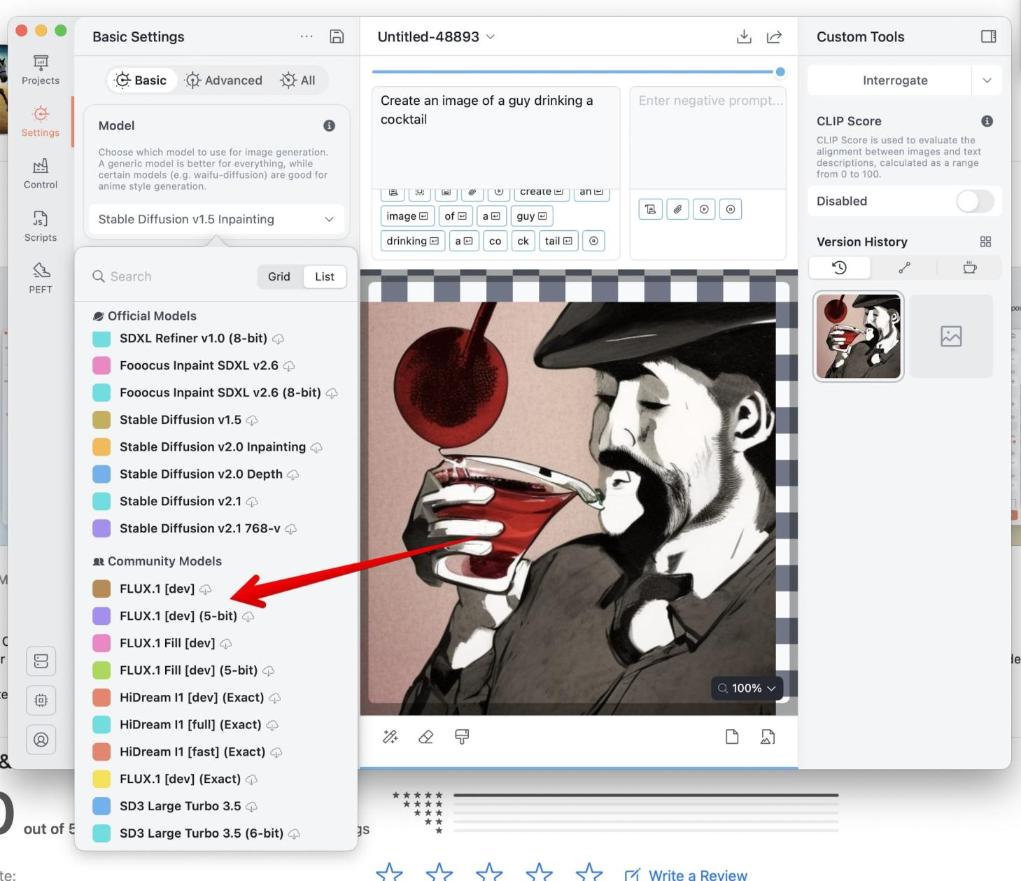
How long does one image take? On a 24GB Mac Mini M4, a 1024×1024 image with FLUX.1 dev (Q6_K, 20 steps) takes about 50 seconds. The faster Schnell model is closer to 20-25 seconds on an M1 with 16GB.
Set your expectations honestly here: Apple Silicon is usable but slower than a discrete NVIDIA GPU, and a heavy ComfyUI path can run several minutes per image. Since everything runs locally, you won’t need an internet connection to create images after your initial setup.
Optional: Use the iPhone/iPad Version
Along with working on Mac, Draw Things is also available for iPhone and iPad. This means you can run Flux AI models right from your phone or tablet. You can create AI art on the go, even without an internet connection, as long as you have one of the newer iOS devices.
Why Run Flux AI Locally on Your Mac?

Running Flux AI on your Mac has some great perks compared to using cloud-based services: full control, privacy, no subscription fees, and the ability to run Flux locally without any internet connection after setup.
- Full control over your model – There’s no content censorship or limits on what you create.
- Skipping cloud costs – You can use your Mac’s Apple Silicon, so you won’t need to rent cloud GPUs.
- Privacy – Everything runs on your machine, so your prompts and data remain private.
- Optimized for Apple Silicon – Flux AI works well on M1, M2, M3, and M4 chips, making the most of Apple’s tech.
- Cost savings – After you install it, there aren’t any subscription fees or rental costs, so it’s cheaper to use AI locally in the long run.
Thanks to Apple Silicon’s solid performance for AI tasks, Mac users can create top-notch AI art offline without worrying about costs or privacy.
With Apple Silicon, Macs are now powerful enough to handle complex AI tasks, whether generating text or creating images with models like Flux, as seen with various LLMs running on Mac.
FAQs
Can I run Flux AI on any Mac?
Flux AI works best on Macs that have Apple Silicon (M1, M2, M3, M4). RAM sets which model fits: a 16GB Mac runs a Q4_KS build, a 24GB Mac runs Q6_K. Older Intel Macs on legacy OS X builds can run Flux, but expect slower, less stable results.
Do I need coding skills to install Flux AI?
Not at all, you don’t need any coding skills. You can easily install and use Flux AI with the Draw Things app, which has a simple interface – no techy setup or command line stuff involved.
Is Flux AI free to use?
Yes, Flux AI is totally free. Just download the model weights and make sure you have enough storage on your Mac.