
Ulysses is one of the most beloved, award-winning, and popular writing tools, best known for its clean look, distraction-free setup, and strong features for writers, bloggers, and students. But there’s a catch: it’s only available on macOS and iOS.
This leaves Windows users out in the cold, since there’s no version for them. You won’t find a Ulysses alternative for Windows that fully replicates its experience. Since it works closely with Apple’s ecosystem, you can’t just install Ulysses on a Windows PC.
But don’t worry, there are some workarounds out there, each with its own ups and downs. We’ll look at three main ways to use Ulysses on Windows, including simulating macOS, alternatives to the software, and the most reliable one – using a virtual Mac for Sketch.
Why You Can’t Install Ulysses Natively on Windows
Ulysses is explicitly built for macOS with tools like Swift and AppKit, which makes it hard to move it to Windows.
Here’s why you can’t find it for Windows:
- There’s no official version for Windows.
- You can’t install it from any source outside of Apple’s App Store.
- Direct installation is not supported due to macOS-only system dependencies.
So, if you’re on Windows, you’ll have to look for alternative options.
3 Ways to Run Ulysses on Windows
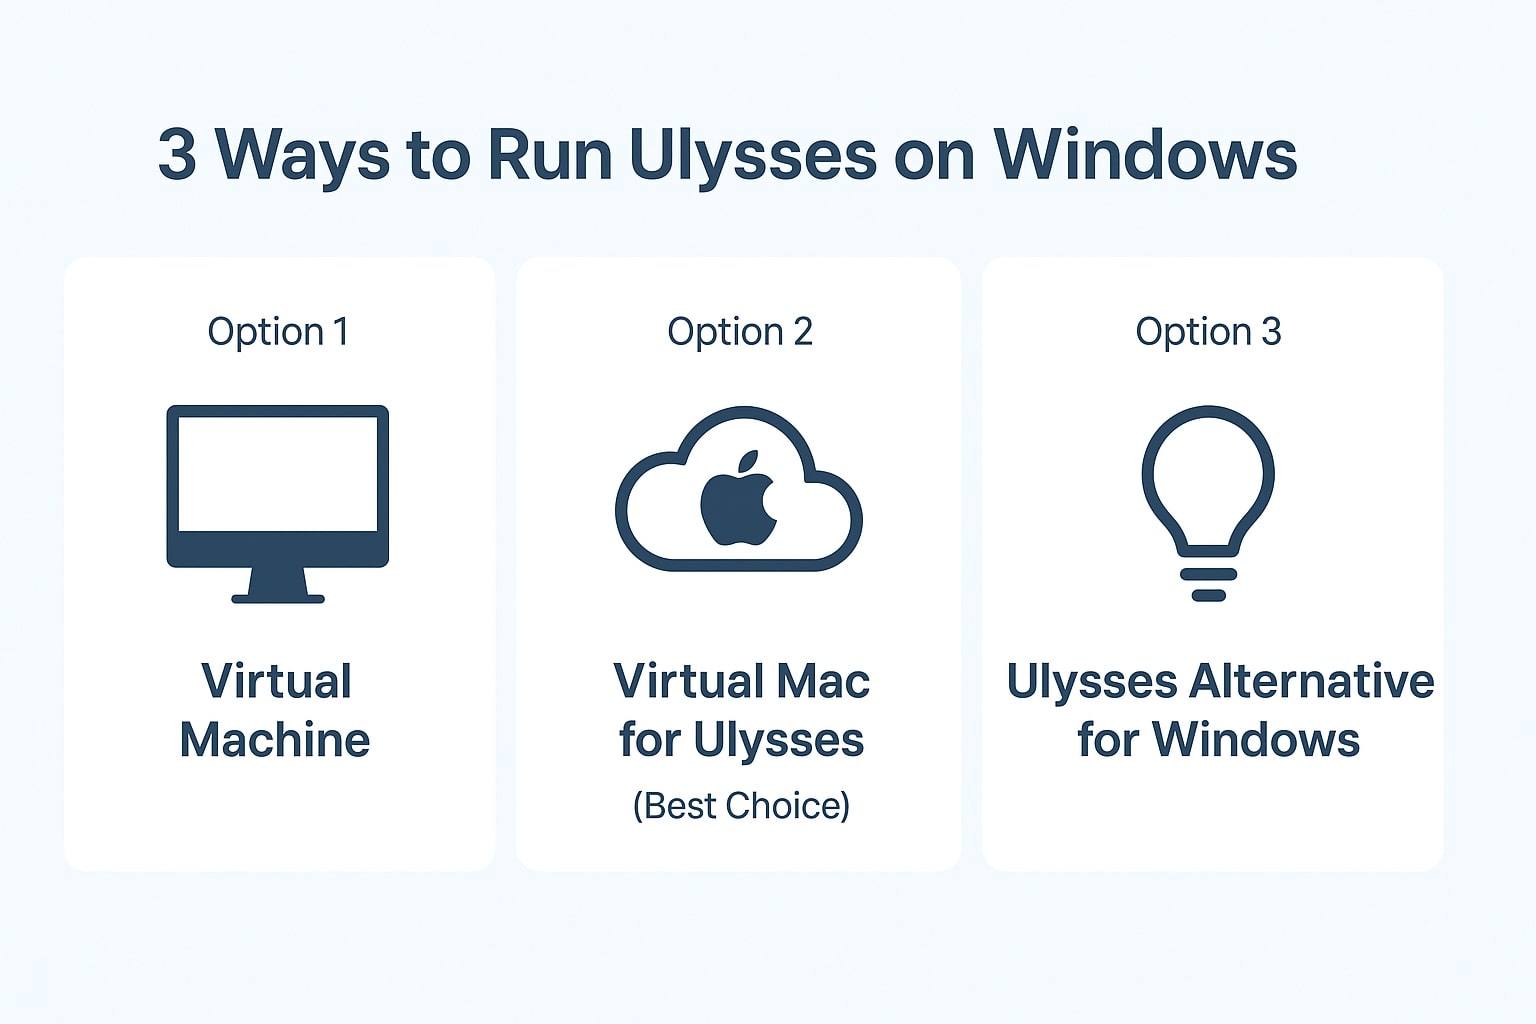
While you cannot install Ulysses on Windows directly, you are not out of luck. Thankfully, there are viable workarounds that will allow you to run the application effortlessly.
Option 1: Virtual Machine
Here’s how to do it:
- Get virtualization software like VirtualBox or VMware Workstation.
- Find a macOS installer (just be aware that this can be legally tricky).
- Set up macOS in the virtual machine.
Pros:
- You get the complete macOS experience.
- It doesn’t cost much upfront if you use free tools.
Cons:
- The setup can be complicated and technical.
- Apple’s rules don’t allow macOS on non-Apple machines.
- You might run into performance issues, especially with graphics-heavy apps.
- Lack of GPU support can lead to slowdowns and crashes.
- You could face system stability problems after updates.
Option 2: Virtual Mac for Ulysses (Best Choice)
A simpler way is to rent a Virtual Mac for Ulysses through providers like RentAMac.io.
Here’s how it works:
- Access a real Mac remotely in the cloud.
- Install Ulysses directly from the Mac App Store.
- Use it on any Windows PC; no tricks are needed.
Pros:
- It’s completely legal and runs on real Apple devices.
- There’s no tricky setup to deal with.
- Fully native performance like you’re on a Mac.
- Data is safe in a secure cloud.
Cons:
Service fee (daily, weekly, or monthly, depending on your needs).
Currently, this is the most reliable way to use Ulysses on Windows.
Option 3: Ulysses Alternative for Windows
If you’re looking for a native solution on Windows, there are some good alternatives to Ulysses:
- Scrivener – perfect for long writing projects and research.
- Typora – a simple markdown editor.
- Obsidian – a useful tool for managing your notes and ideas.
- Bear (works on Windows through the web but is limited).
Limitations:
- None of these options gives you the whole Ulysses experience.
- You might notice differences in how they look, their export options, and how they sync.
- Lack of iCloud integration.
How to Run Ulysses on Windows with RentAMac.io
If you want to use Ulysses on a Windows PC, the easiest way is to use a virtual Mac. This way, you can work in a real macOS setting right from the cloud, without any complicated setups or worries about legality.
Using RentAMac.io is pretty straightforward:
Step 1: Pick a Plan and a Payment Method

Head over to our Pricing page and choose a plan that suits you. After that, just check out and pick your payment option, whether it’s a credit card, Apple Pay, Amazon Pay, or link.
Step 2: Connect to Your Mac Mini
Once your payment goes through, you’ll get sent to your dashboard, where you can pick and connect to your dedicated Mac mini. You’ll also get the login details for the Mac and the remote access tool.

To get to your Mac, you’ll be using AnyDesk. It’s a remote desktop app that lets you control your rented Mac just like it’s right in front of you. Just install AnyDesk on your Windows PC, enter the AnyDesk ID you received, and log in with your password.
Step 3: Access Your Mac through AnyDesk
If you haven’t installed AnyDesk yet, click the Download AnyDesk button and follow the easy installation steps. After it’s installed, open the app, enter your AnyDesk ID, and type in your password when the authorization screen pops up.

Now you’re connected to your dedicated Mac mini and ready to install Ulysses.
Step 4: Download Ulysses and Start Writing!
Go to the Mac App Store from your rented Mac mini and download Ulysses. You can log in with your existing account or start a free trial if you’re new to it.
Once installed, you can start writing – all from your Windows PC using your Mac setup for Ulysses.
Make sure to save your Ulysses projects to your favorite cloud storage service like iCloud, Dropbox, Google Drive, or anything else you like. This way, you can easily access your writing from any device.
Who Is This For?
Renting a virtual Mac for Ulysses is perfect for:
- Writers looking to use Ulysses on Windows.
- Bloggers needing good writing tools that work on different platforms.
- Students who want top-notch writing software but don’t have a Mac.
- Anyone wanting to use some macOS apps now and then without having to buy a Mac.
FAQs
- Can I install Ulysses on Windows?
No, Ulysses is only available for macOS and iOS, but there are a number of other options, with renting a virtual dedicated Mac being the most reliable one.
- Is it legal to rent a Virtual Mac?
Absolutely, services like RentAMac.io follow Apple’s licensing rules and use real Apple hardware.
- Are there any free options?
You can find virtual machines, but they come with legal risks, can be tough to set up, and may not work well.