

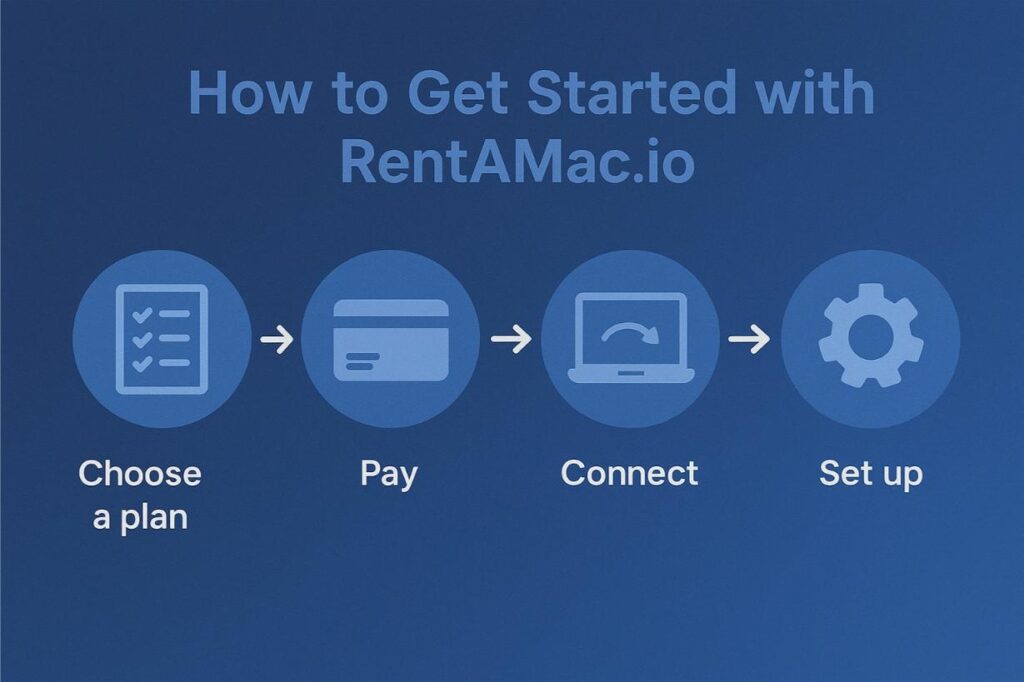
To get started with RentAMac.io, you must select a plan, choose the preferred payment option, connect to a Mac mini, and set up your workspace.
Step 1. Select a plan
At this step, go to the Pricing tab in the menu, check the available plans, and click the Buy Plan button. You will then be redirected to the Checkout page.
Step 2. Select the payment method and proceed
RentAMac.io offers several payment methods, including Link, Amazon Pay, Apple Pay, and a credit card option.

Step 3. Select and connect to your Mac mini
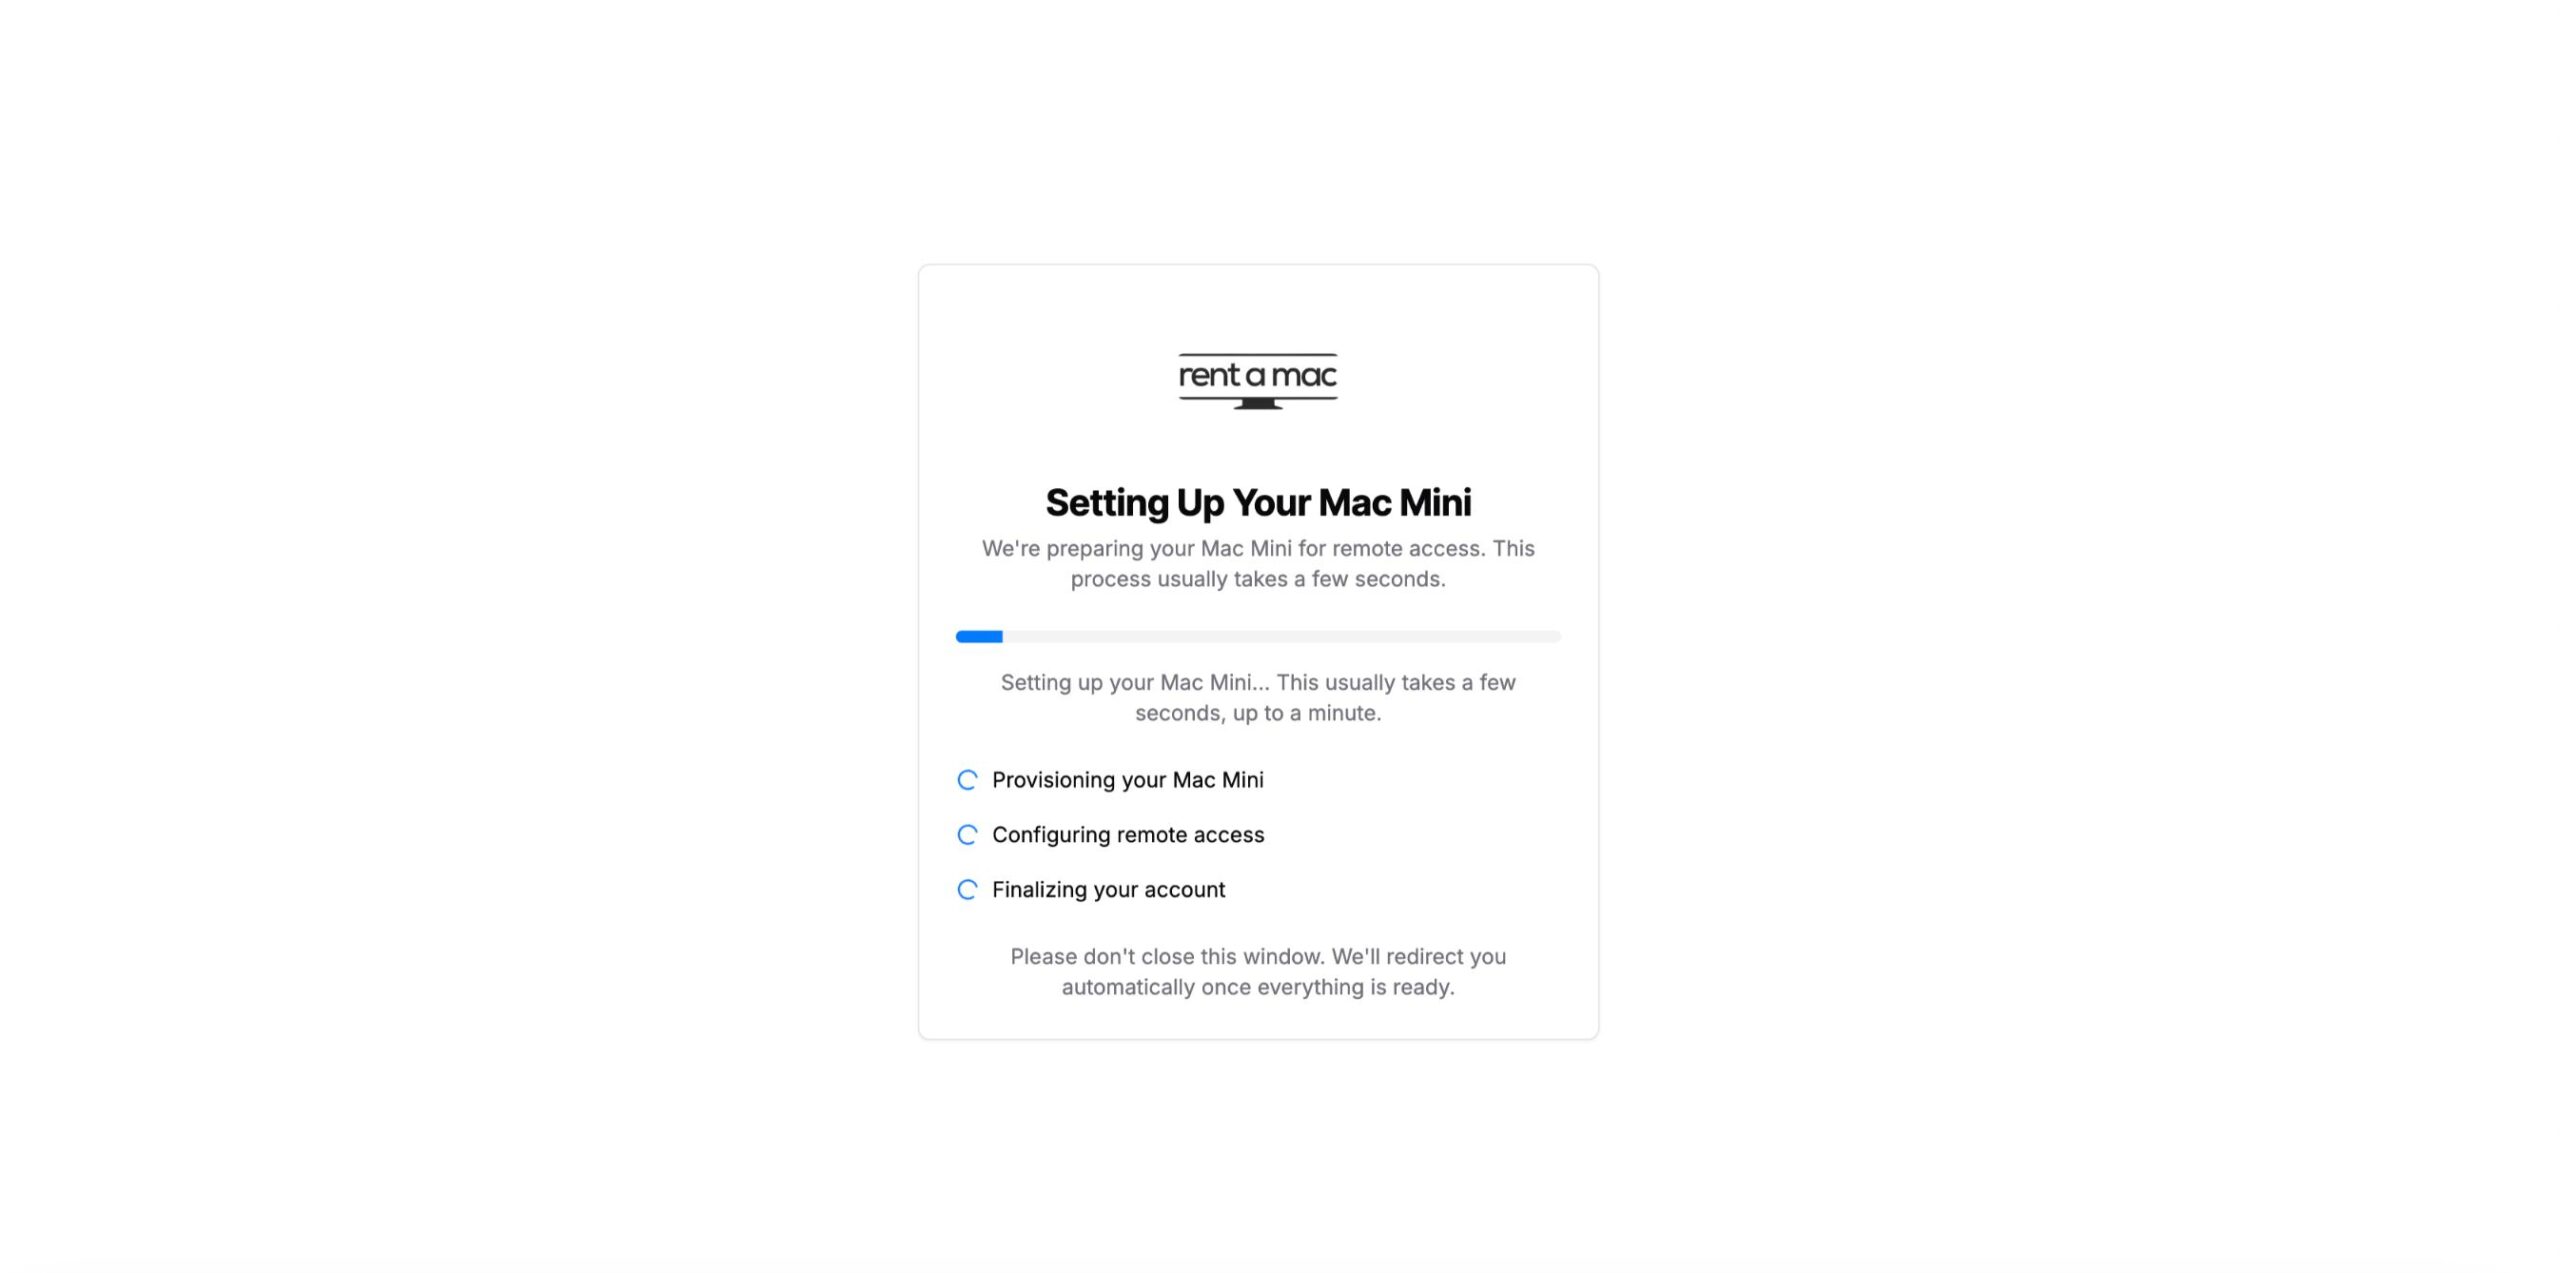
After the payment is processed, you get redirected to the Set up page, which reflects the status of the Mac device setup.
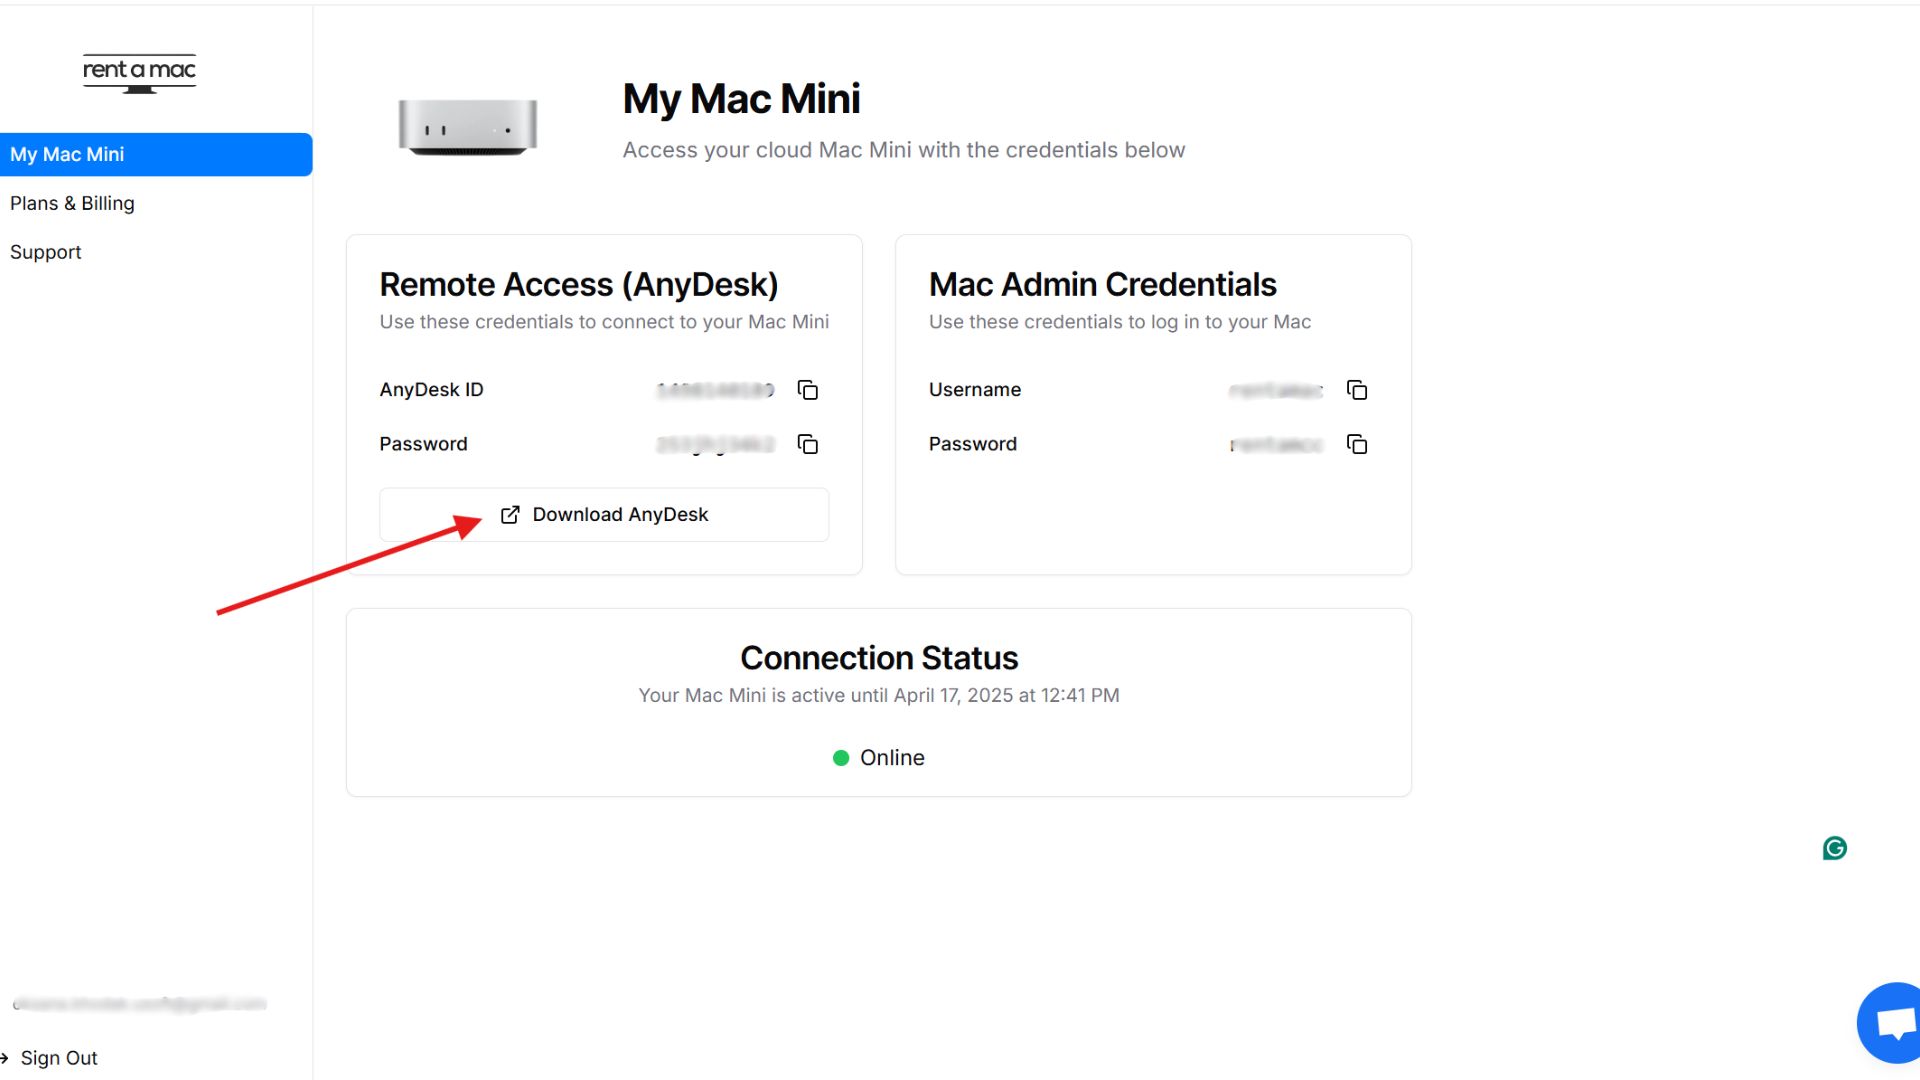
As you connect to your Mac mini, you are on the dashboard, where you can see the credentials for the AnyDesk connections and the Mac mini admin credentials.
Once you have the AnyDesk setup and ready, copy your AnyDesk ID and paste it into the login field on your AnyDesk app:
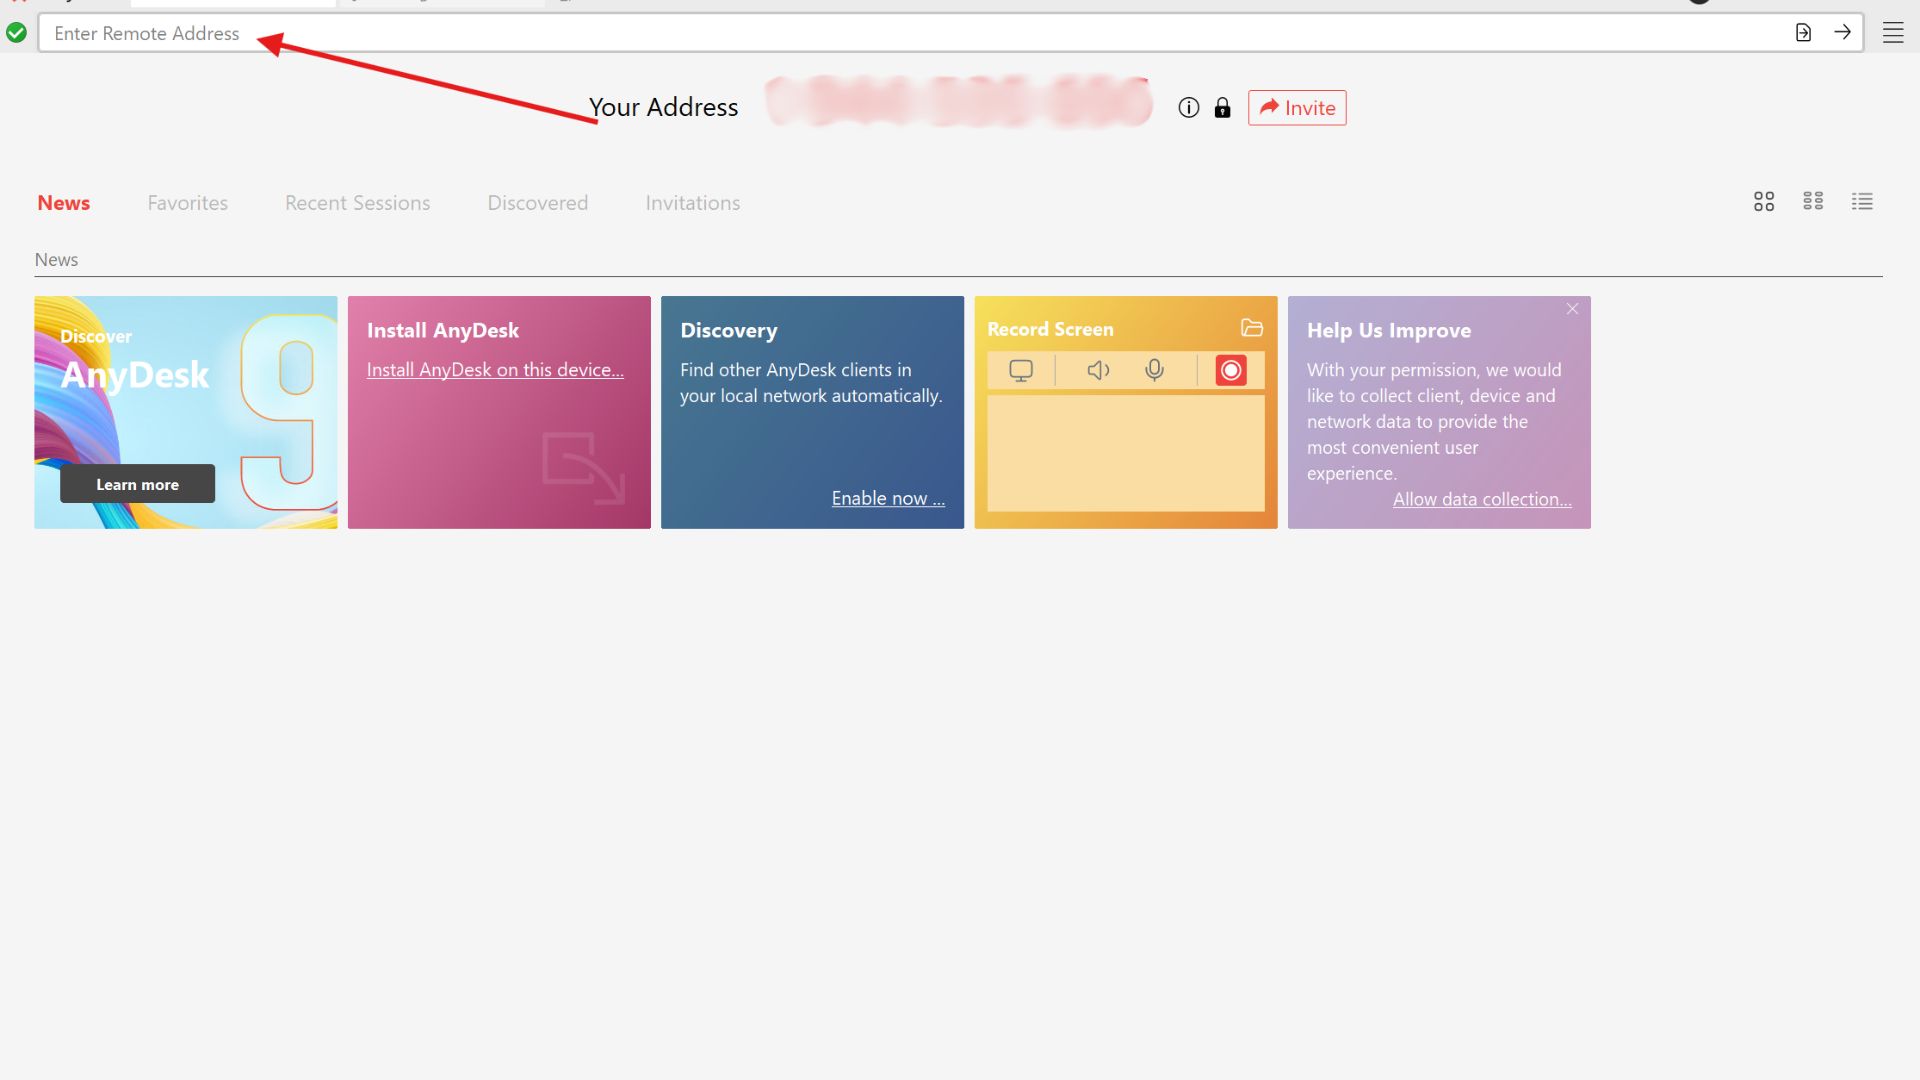
Next, the authorisation window will appear. Paste your password and press OK.
Step 5. Enjoy!
At this step, you are connected to your remote Mac mini and can start working on your tasks.

On the screen, you also have a window displaying your administrative rights.

So, now you are ready to explore the benefits of working on a Mac mini with RentAMac.
Want to get online access to a dedicated Mac computer?
Rent a Mac and get access to the dedicated Mac mini with full admin rights for the duration of the rental!