Stable Diffusion is a popular open-source AI tool that helps you create impressive images right from text prompts. The best part? You can simply run it right on your Mac using the Draw Things app. There’s no need for cloud services, subscriptions, or tricky setups. Thanks to the easy Stable Diffusion Mac setup, even beginners can jump into making AI art in no time.
What is Stable Diffusion?
Stable Diffusion is one of the most well-known free tools that turns your text into images. Just type in what you want, and it generates detailed and realistic pictures. Unlike a lot of paid AI options, you can use Stable Diffusion without any restrictions, which is great for creators who want to experiment freely.
Even better, you can run Stable Diffusion on a Mac easily, without having to deal with tricky setups or cloud services. It works well on newer Apple Silicon Macs, like the M1, M2, M3, and M4, so you can create art offline quickly without needing extra hardware.
Tools You Need: Draw Things App
If you’re looking to install Stable Diffusion on your Mac, Draw Things is a great option. It’s designed to run AI models like Stable Diffusion right on your device.
- Works on Mac and iOS devices (iPhone and iPad)
- Fully compatible with Apple Silicon (M1, M2, M3, M4)
- Comes with a built-in downloader for Stable Diffusion and other models
- Easy to use, no tech skills required
You can get Draw Things straight from the App Store. We’ll walk you through the installation process next.
How to Run Stable Diffusion on Your Mac, Step by Step
To run Stable Diffusion on your Mac, follow these easy steps:
- Download and install Draw Things on your Mac.
- Open the app and look for the model downloader section.
- Pick a Stable Diffusion model from the list and download it.
- Load the model and run it locally.
Let’s break down each of these steps.
Step 1: Download Draw Things
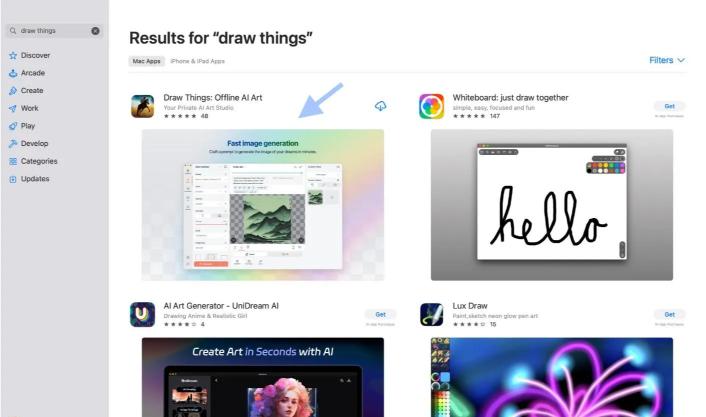
First, download Draw Things: Offline AI Art from the App Store.
If you want it to run well, it’s best to use a Mac with Apple Silicon (like M1, M2, M3, or M4). Having at least 16GB of RAM will help it load models quicker and create images more smoothly.
Step 2: Open the App and Load the Stable Diffusion Model
Once you have it installed, go ahead and open Draw Things. You’ll see a screen with three options:
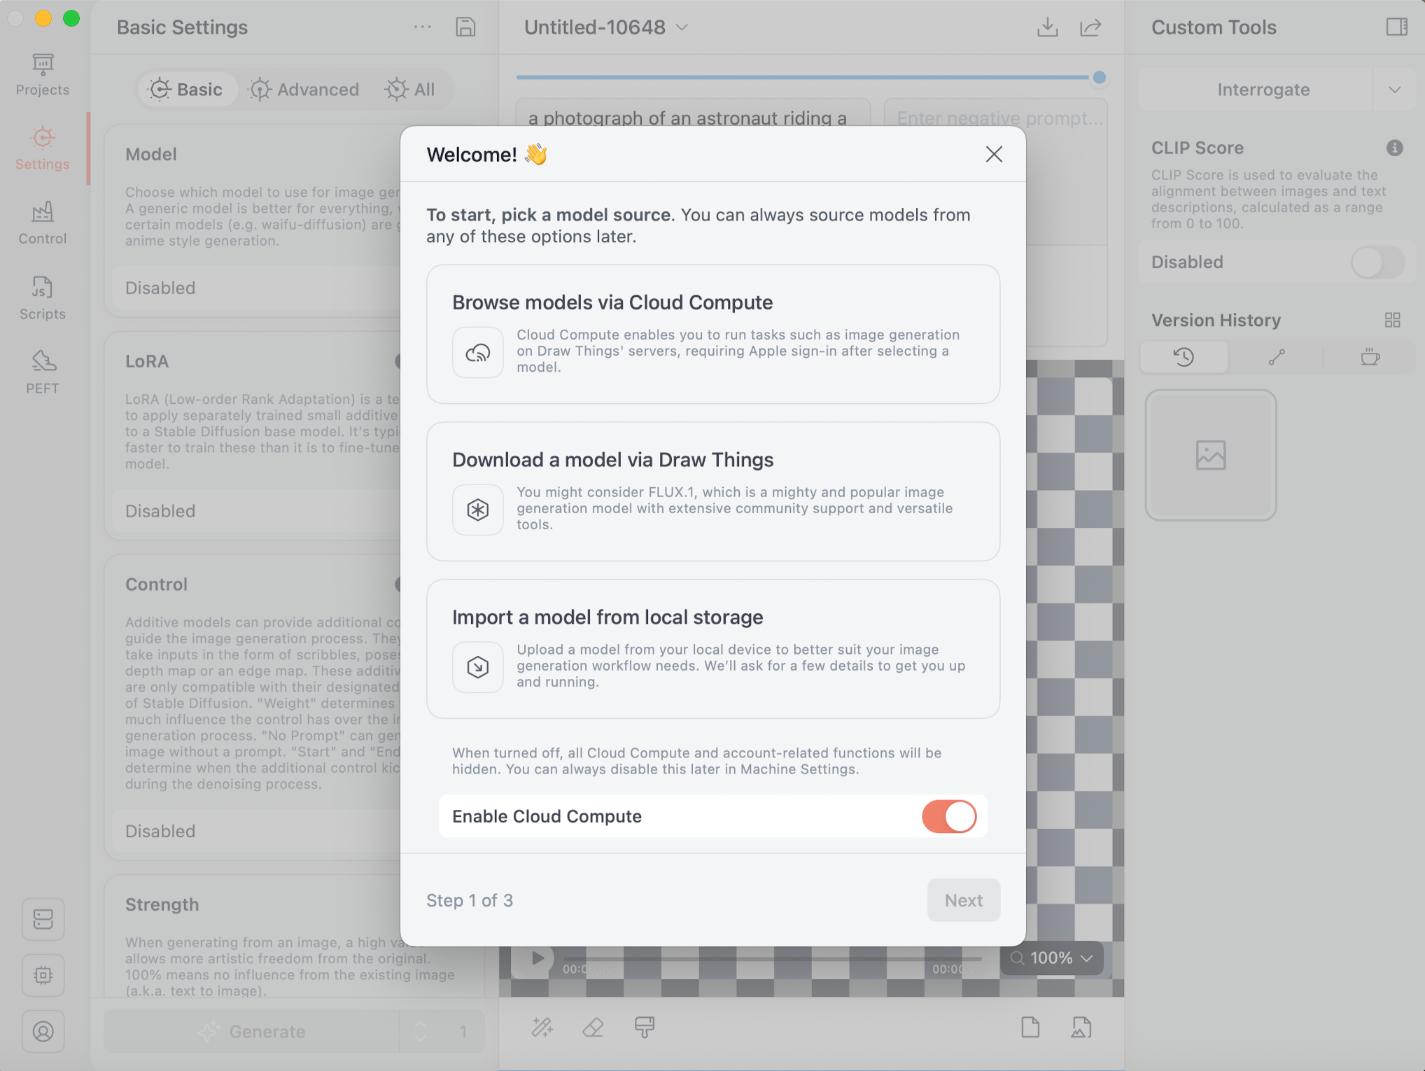
Choose the second option: Download a model via Draw Things. Then, look for “Stable Diffusion” in the models section:

You’ll find different versions to choose from. Pick one that works best for you. Once you select your model, the app will handle the download and installation for you.
Step 3: Adjust Settings (Optional)
Before you start making images, you can tweak some settings in Draw Things:
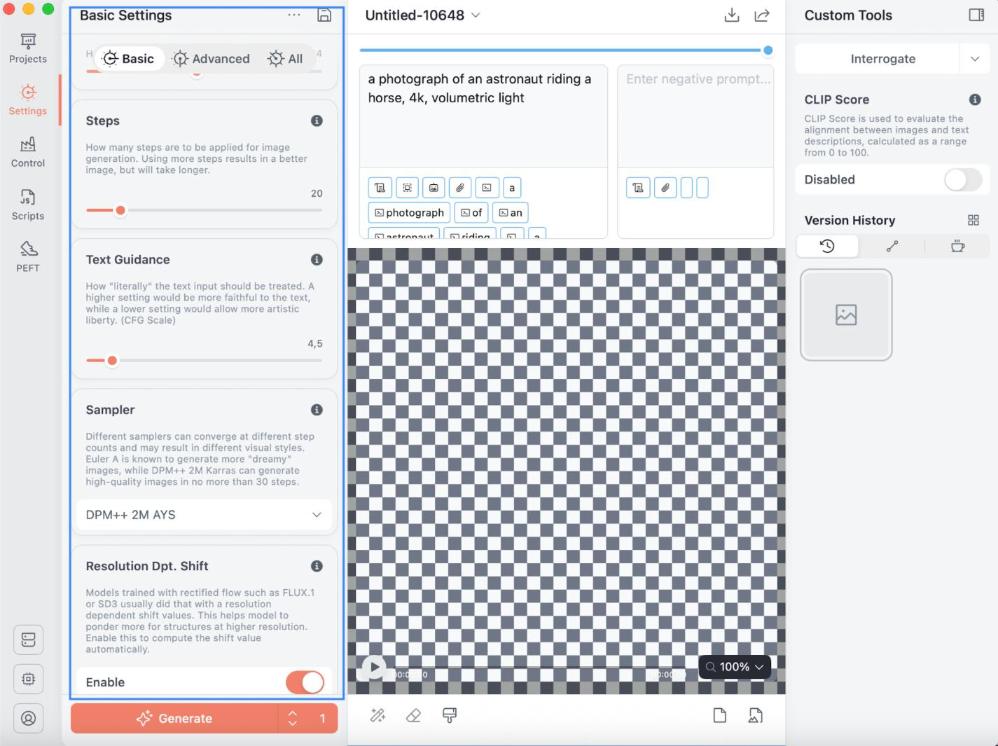
- Sampling Steps – More steps mean better detail, with options from 1 to 150.
- Image Size – You can choose from different suggested measurements. For best results, we recommend using 1:1 / Normal size.
- Strength – A high value of strength allows more artistic freedom from the original, ranging from 0% to 100%.
Step 4: Start Creating Images
After you’ve got your model set up, you can run Stable Diffusion locally by typing your prompts in Draw Things:
- Type your text prompt in the prompt field.
For example: “A futuristic city skyline at sunset.”
- Click Generate and wait a bit for your image to appear.
- Your AI-generated image will save right on your Mac.

Since you’re using Stable Diffusion locally, you won’t need the internet after your initial setup.
Optional: Use the iPhone/iPad Version
You can also use Draw Things on your iPhone or iPad. This lets you run Stable Diffusion right on your phone or tablet, so you can make awesome AI art anytime, anywhere, even if you’re not connected to Wi-Fi.
Why Run Stable Diffusion Locally on Your Mac?

Running Stable Diffusion on your Mac has some solid perks:
- Full control over your model – no restrictions or censorship.
- Skipping cloud services fees – just use your Mac’s Apple Silicon instead of renting GPUs.
- Privacy – Everything runs on your machine, so your prompts and data remain private.
- Optimized for Apple Silicon – Working great on M1, M2, M3, and M4 chips.
- Cost savings – There are no ongoing costs.
With Apple Silicon, Macs are now powerful enough to handle complex AI tasks, whether generating text or creating images with models like Stable Diffusion, as seen with various LLMs running on Mac. Whether you’re making art or trying out different styles, you enjoy complete privacy, control, and great performance.
Conclusion
In just a few easy steps, you can complete your Stable Diffusion Mac setup and start creating AI art locally. After the installation, you can quickly generate your visuals, paired with total privacy – plus you won’t need any tech skills.
FAQs
- Can I run Stable Diffusion on any Mac?
Stable Diffusion works best on Apple Silicon Macs like M1, M2, M3, and M4. It might work if you have an older Intel Mac, but it’ll be a lot slower.
- Do I need coding skills to install Stable Diffusion?
No, you don’t need any coding skills. You can easily install Stable Diffusion using the Draw Things app, which is pretty simple to use.
- Is Stable Diffusion free?
Yes, it’s free! Stable Diffusion is open-source, so just download the model weights and make sure you have enough storage space on your Mac.