
On this page
Whisper is a speech-to-text model created by OpenAI that you can use for free. With MacWhisper, you can easily run Whisper right on your Mac without worrying about subscriptions. Thanks to the straightforward Whisper Mac setup, you can start transcribing audio in just a few minutes, even if you’re new to this.
Tools You Need: MacWhisper App
Running Whisper on macOS takes just one app: MacWhisper. It needs no command line, so any Mac user can start, and it turns the Whisper model into something anyone can use with no tech skills needed.
- It’s made for macOS and runs smoothly right from the start.
- Supports the full Whisper model family, from Tiny (about 75MB) up to Large-v3 (about 3GB), plus the newer large-v3-turbo. Accuracy rises with size, from roughly 88 to 97 percent.
- It works great with Apple Silicon hardware.
- Simple drag-and-drop interface for your audio files.
- Works entirely offline after setup, so your data stays private.
You can get MacWhisper directly from Gumroad.
MacWhisper is free to download. The free tier covers the Tiny, Base, and Small models. Pro unlocks Medium, Large-v3, and Turbo plus speaker separation and batch processing. As of 2026, Pro is about €59 (around $69) one time on Gumroad. There is also an App Store version at $29.99 a year or $99.99 for a lifetime license.
Here’s the honest part: the free Tiny and Small models are enough for most quick jobs. The Large model is slower and often only a percent or two more accurate, so Pro is not always worth it. MacWhisper is also not the only option; Buzz is a free, open-source alternative.
How to Run Whisper on Mac, Step-by-Step
To run Whisper on your Mac, follow these easy steps:
1. Visit Gumroad, download, and install Whisper on your Mac.
2. Open the app and proceed to the model downloader section.
3. Pick a Whisper model from the list and download it.
4. Load the model and run it locally.
Let’s break down each of these steps.
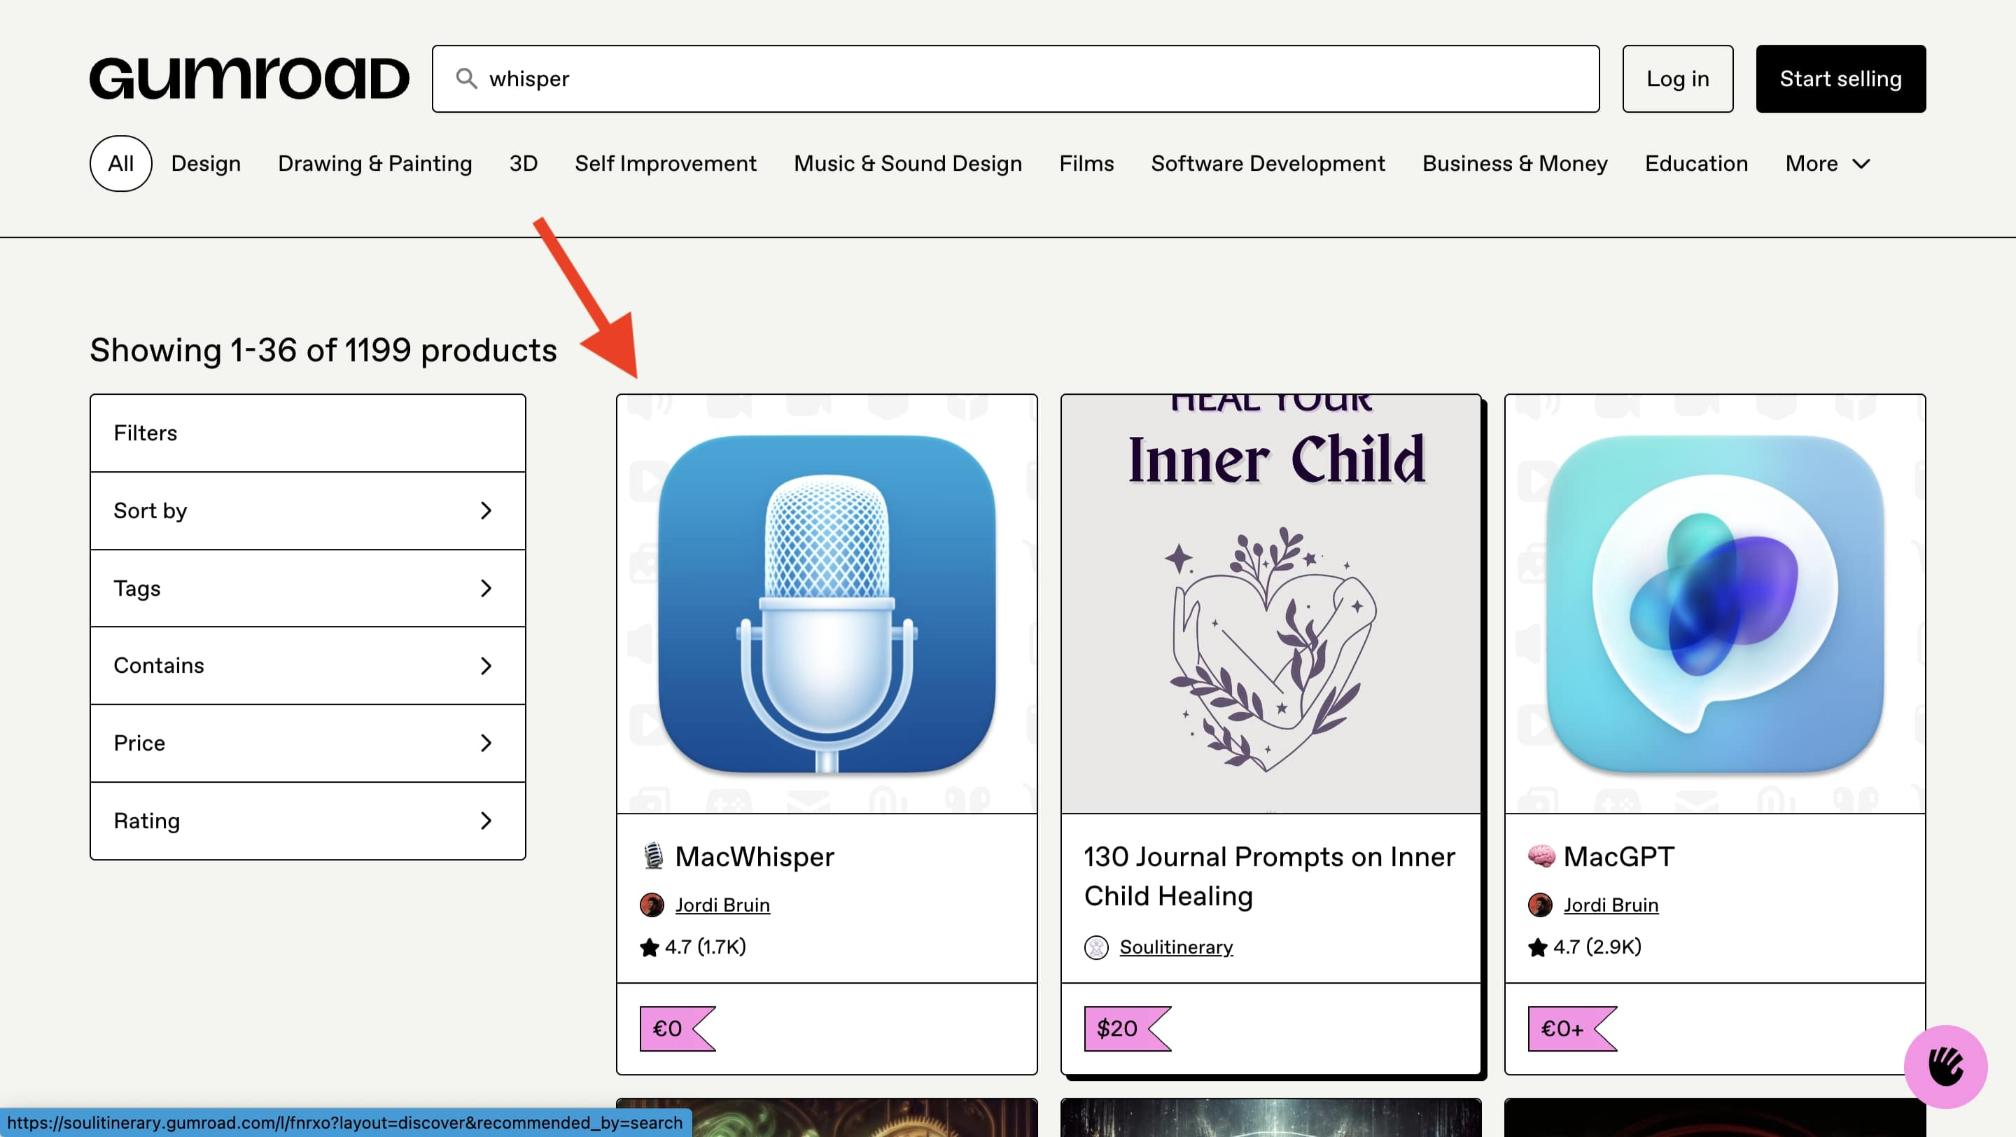
Step 1: Visit Gumroad
First, visit Gumroad and search for Whisper. You should choose this option from the list:
If you want it to run well, it’s best to use a Mac with Apple Silicon (like M1, M2, M3, or M4). While it can work on Intel Macs, they may struggle with larger models or longer audio files.
RAM matters by model. The Small model needs about 1GB, but Large-v3 wants around 10GB, so an 8GB Mac can crash or slow badly on the Large model. Stick to the smaller models if your Mac has 8GB.
You’ll be offered several options like MacWhisper Free, Pro, and options with 5, 10, 20, and 50 licenses: pick the one that works best for your needs:
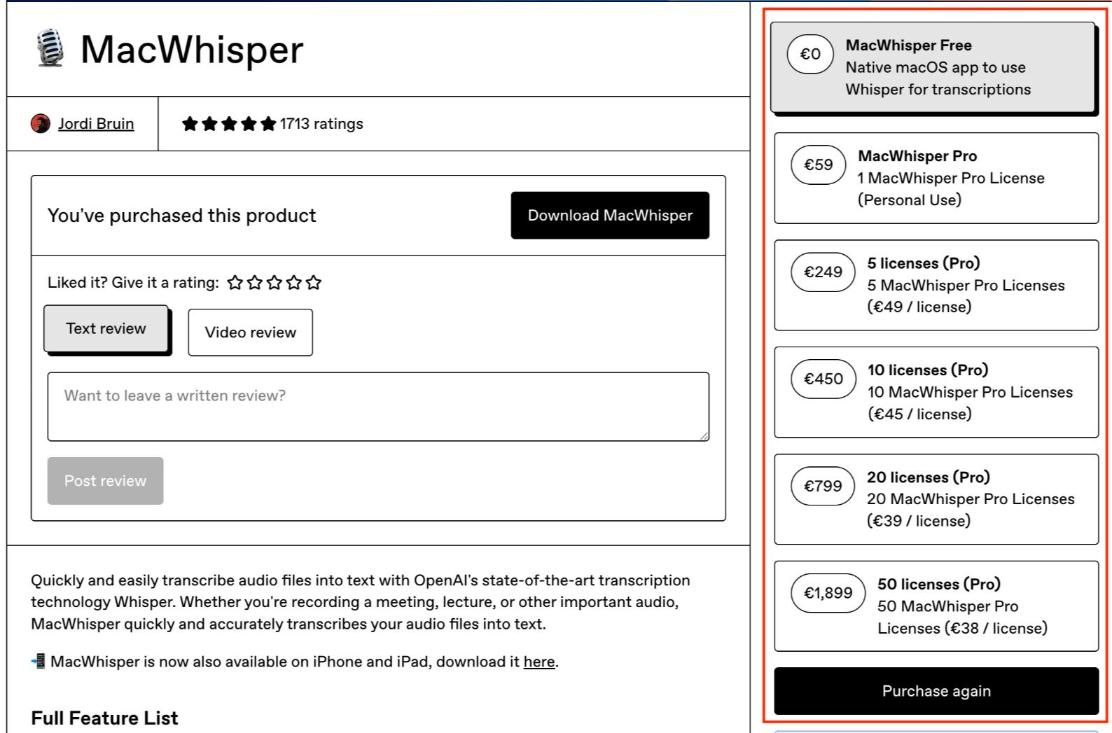
After you’ve made your decision, move forward and install Whisper.
Step 2: Open the App and Load a Whisper Model
Once you have it installed, go ahead and open the app. You’ll see an interface with a few options, and this is what will pop up if you’ve installed MacWhisper Free, for instance:
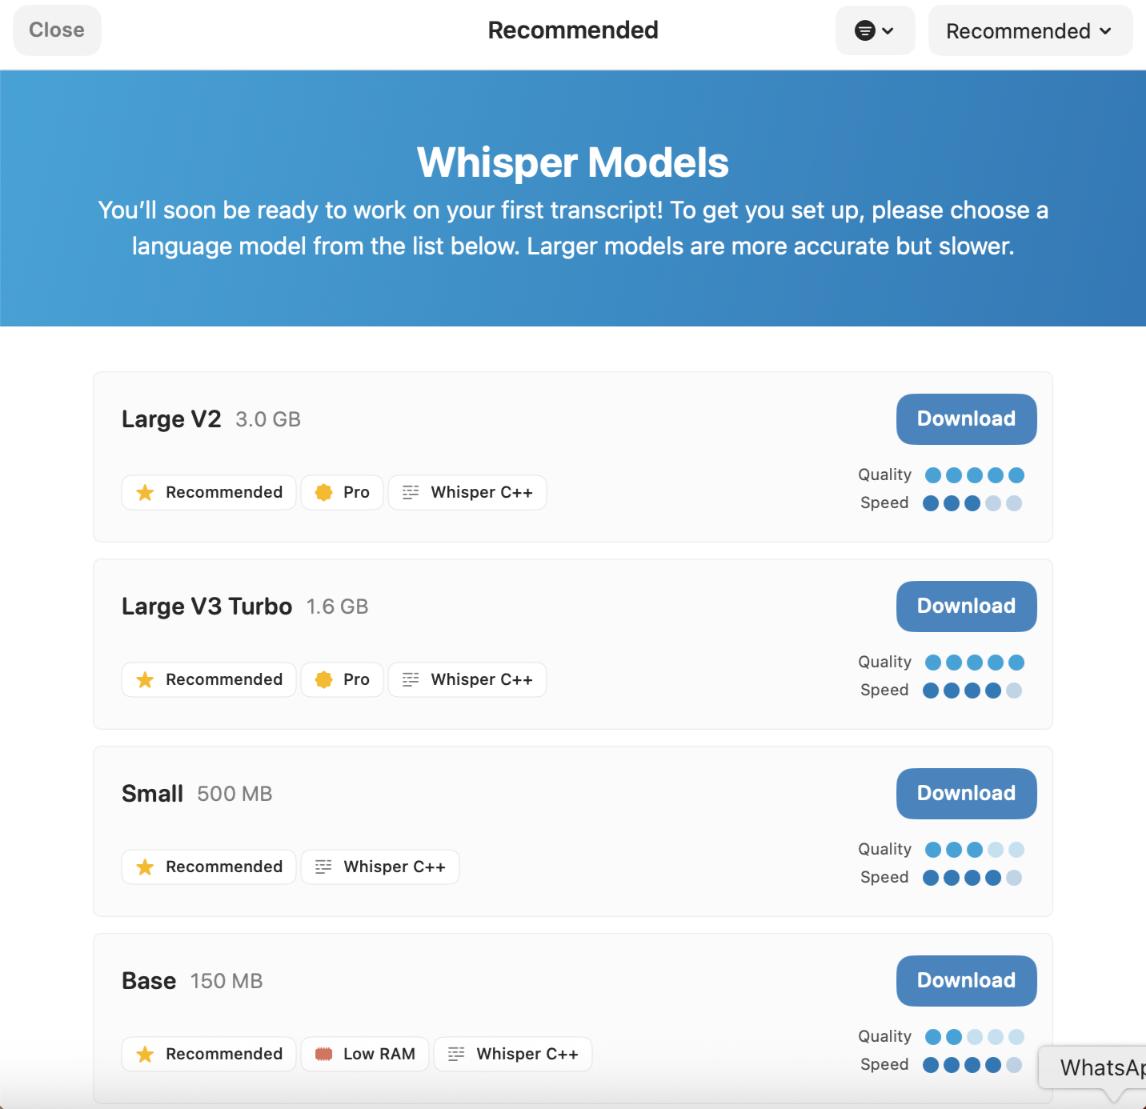
Whisper will automatically download the model you select and install it for you, with no technical steps required.
Step 3: Adjust Settings (Optional)
Before you start transcribing, you can adjust a few parameters from the settings:

- Language: You can let Whisper figure it out or pick the language yourself.
- Output format: Choose how you want to save your transcripts, like TXT, SRT (for subtitles), or CSV.
Timestamps: You can add timestamps for subtitles or detailed timing in your transcript.
- Speaker separation (Pro): This helps to tell different speakers apart.
Step 4: Start Transcribing
Once you have Whisper all set up, there are a few options presented to start transcribing based on your needs.

Just pick your input source and hit Transcribe. Everything gets processed right on your Mac, so your files stay private and safe.
It’s quick, too. On Apple Silicon, one creator transcribed a 2-hour video in about 2 minutes 45 seconds, and GUI apps like this can run up to roughly 15 times faster than real time.
Run Whisper free from the Terminal
Prefer not to pay? You can run Whisper for free from the Terminal with whisper.cpp. Install it with two Homebrew commands, download a model, then point it at an audio file. On Apple Silicon it runs on the Neural Engine, roughly 2 to 4 times faster than the plain Python build, and it skips MacWhisper entirely.
The Terminal is the plain text app built into macOS, and Homebrew is a free tool that installs Mac software from one command. With Homebrew set up, two commands do it:
“`
brew install whisper-cpp
brew install ffmpeg
“`
The first installs whisper.cpp. The second installs ffmpeg, which reads your MP3 or M4A audio. Then you download a model and run whisper.cpp on your audio file.
Why bother on a Mac? whisper.cpp uses Apple’s Neural Engine and Metal, so it beats the plain Python build. One test transcribed a 3 minute 20 second podcast in about 20 seconds on an M2 MacBook Air, roughly 2 to 4 times faster.
No Apple Silicon Mac of your own? You can rent a cloud Mac mini M4 from Rentamac.io and run the same commands.
One honest warning. The reference openai-whisper command line with the --device mps flag is broken on Mac right now, so skip it and use whisper.cpp. If you want a free app instead, try Buzz.
Match the model to your Mac’s memory and the accuracy you need.
| Model | Size | RAM | When to pick it |
|---|---|---|---|
| Tiny | ~75MB | ~1GB | Fast drafts, quick notes |
| Small | ~500MB | ~1GB | Good balance for most clips |
| Medium | ~1.5GB | ~5GB | More accuracy, longer audio |
| Large-v3 | ~3GB | ~10GB | Best accuracy, not for 8GB Macs |
| Large-v3-turbo | ~1.6GB | ~6GB | Near-Large accuracy, much faster |
For a faster power-user route, mlx-whisper (Apple’s MLX framework) transcribed just under 20 minutes of audio in just over 40 seconds on a 2021 M1 Max, though it takes more setup. For the full version, see how to run Whisper locally on a Mac, PC, or cloud machine, plus our guide to other local AI models.
Why Run Whisper Locally on Your Mac?

Full control over your model – Your data stays right on your Mac.
No ongoing fees – You won’t deal with API costs or subscriptions.
Privacy – You don’t have to worry about uploading private recordings to other servers.
Optimized hardware – On Apple Silicon, whisper.cpp runs on the Neural Engine and Metal, so it is roughly 2 to 4 times faster than the plain Python build of Whisper.
Cost-effective – After the initial setup, you can transcribe as many files as you want without extra costs.
With the power of Apple Silicon, your Mac can do real-time transcription offline, which is perfect for journalists, researchers, podcasters, or anyone who needs secure speech-to-text processing. Thanks to Apple Silicon’s ability to handle complex AI models, including large language models like Whisper and other LLMs running on Mac, you can run advanced AI tools fully offline.
Conclusion
A few steps get you transcribing audio on your Mac, whether you use the MacWhisper app or the free Terminal path. It handles interviews, meetings, podcasts, and notes, all offline.
You don’t need coding skills, and your files stay on your Mac. On Apple Silicon, the transcriptions are fast even for long recordings.
FAQs
Can I run Whisper on any Mac?
Whisper works on all Macs, but is best on Apple Silicon Macs (M1, M2, M3, M4) as they’re faster and more stable with the larger models. Intel Macs can run the smaller models like Base or Small, but they might be slower, especially with long or high-quality recordings.
Do I need technical skills to use MacWhisper?
Not at all, you don’t need to know anything technical. Whisper takes care of downloading models, updates, and processing automatically. Just install the app, pick your model, and drag in your audio files. The rest is done for you.
Is Whisper completely free?
Yes, the Whisper model is open-source and free to use, with paid versions. MacWhisper has a free version that includes most basic transcription features, along with a Pro version that has extra features like speaker recognition, batch processing, and faster handling with Pro models.
Is my data safe?
Absolutely. With Whisper, all your transcription happens right on your Mac. Your audio files are never sent to any external servers or third parties, making it a great option for sensitive recordings.
What is the best free way to run Whisper on a Mac?
For a free, no-purchase route, run whisper.cpp from the Terminal (brew install whisper-cpp and brew install ffmpeg), roughly 2 to 4 times faster than the Python build on Apple Silicon. If you’d rather have an app, Buzz is a free, open-source option. MacWhisper’s free tier also works for shorter clips.